
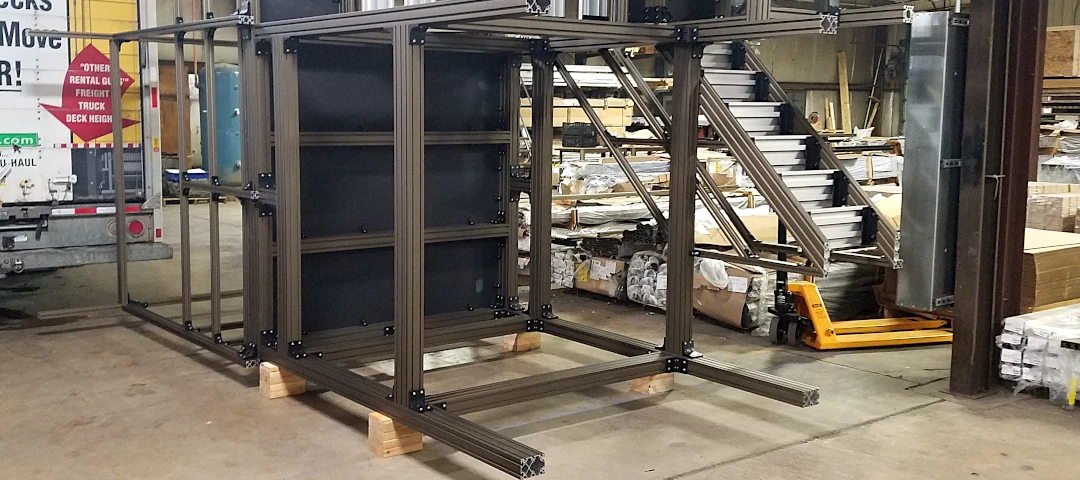
Aluminum extrusions are a glorious combination of modularity and lightness, making them great candidates for framing assemblies. Compared with welded steel frame assembly, which requires paying an available skilled technician, aluminum builds are easier to accomplish in-house.
Ultimately, your speed depends on the aluminum framing system you choose. To understand the task ahead of you, check out the step-by-step processes for traditional T-slot and alternative extrusion assembly.
(Full disclosure: The second method requires a material/process change.)
Getting Started With T-Slot Assembly
We’ll use a common 24”x24”x24” cube assembly with a standard corner bracket as a point of reference for how long the build will take.
Typical Assembly Time: Extrusion Framing
|
|
T-Slot (Standard) Framing |
Est. Time |
Self-Aligning (Advanced) Framing |
Est. Time |
|
1 |
Unbox & organize |
5 min. |
Unbox |
2 min. |
|
2 |
Assemble subcomponents |
7 min. |
Assemble & tighten frame |
15-20 min. |
|
3 |
Loosely assemble frame |
10 min. |
Verify |
2 min. |
|
4 |
Align frame |
10 min. |
— |
— |
|
5 |
Tighten connections |
15 min. |
— |
— |
|
6 |
Measure, loosen, realign, retighten, repeat |
10 min. |
— |
— |
|
7 |
Verify |
2 min. |
— | — |
|
TOTAL |
59 min. |
TOTAL |
19-24 min. |
Building with T-slot aluminum extrusions as seen in the left column will get you a cheap and short-term solution. “Self-aligning framing,” a lesser-known T-slot alternative, refers to a modular system that uses high-strength connections and angled bolts to mechanically lock. While their extruded profiles look similar, the list of assembly steps is much shorter because it’s built for automatic precision and ease of use.
We’ll avoid a discussion of welding the aluminum – there are a host of concerns with doing that. (Seriously, if you insist on welded joints, just use steel structural framing.)
Before you make a decision, check off a few boxes for efficiency’s and quality’s sake:
- Decide your assembly route – Some users are confident DIY’ing it; others outsource assembly to the T-slot manufacturer or a third-party integrator for an extra charge. Often this requires shipping assembled products for added costs.
- Ask an outsider to review your design – Engineers tend to overdesign (yet, somehow, underengineer) when using modular framing, adding costs for unnecessary brackets and profiles . An extrusion framing supplier with design experts on staff can point out structural flaws and opportunities to reduce weight, footprint, and cost.
- Get your tools ready – Most modular aluminum systems use a similar set of basic tools, though some require a larger variety than others.
Your assembly instructions should include diagrams of both the completed structure and an “exploded” view. There should be IDs for every component and its corresponding fastener.
T-Slot Assembly Steps

Step 1: Unbox & Organize
Time to see if you got everything you ordered!
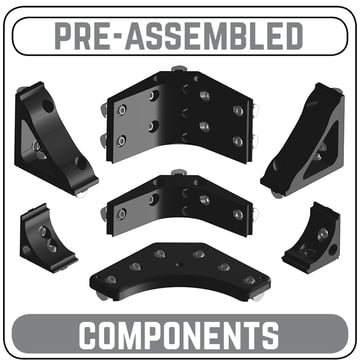
Aluminum framing kits tend to become a mess – expect many bags of various profiles, nuts, bolts, brackets, and other components. Some manufacturers preassemble component kits as part of the order, while others charge extra for this convenience.
Before you assemble anything, unpack every part and group similar ones together so you don’t get mixed up.
(Tip: Depending on the maker, your parts may have engraved ID numbers.)
Because some suppliers’ parts require machining before they ship them, double-check that all such parts are done to specifications.
Step 1.5(?): Tap Holes
If you're building with T-slot aluminum extrusion, you’ll be connecting profiles in some way. Some systems rely on brackets and plates, while others require tapping holes into the profiles’ ends.
There are multiple methods to tapping an aluminum extrusion. One of the most common ways (seen in this video showing an 80/20 profile) involves several steps:
- Preparing a drill or T-handle
- Lubricating the surface
- Inserting the tap
- Reversing and pulling out any time the tap is no longer perpendicular or gets jammed
- Pushing forward again until it’s secure
(Tip: For your sanity, avoid tapping whenever possible.)
A standard assembly will take up to 2 minutes to tap holes for leveling feet. If the tapping will also be used to replace corner brackets, that process could take up to 10 minutes.
Step 2: Assemble Bracket Subcomponents, Etc.
If these aluminum extrusion framing components don’t come pre-assembled, you’ll have to sort the subcomponents and put them together before continuing.
When you have the pieces in the right position, simply tighten the fastener.
Step 3: Loosely Assemble the Framing
Most structures and machines are easiest to build from the bottom up. This is especially true if the design is heavy or has complex geometry. Smaller jobs may be easier to take on with the object on its side or upside-down.
Installing T-nuts is easy, and if you’re lucky, all the manufacturer’s profiles will use the same nut type. Many aluminum extrusion framing systems allow you to install and remove “drop-in” style T-nuts at any position on the profile.
Keeping certain brackets and profiles loose (for now) leaves you the option of inserting profiles later in the process.
(Tip: Loosely install T-nuts with a fastener, then slide them into the appropriate profile. This way you only have to align the profile’s nuts once.)
This is a good time to find a flat surface and pre-assemble anything you can away from the main build. Also, set in place any panels that need to go in an extrusion slot – this won’t be possible once you’re finished with assembly.
Step 4: Align the Frame
There are systems that don’t require this step, but most do.
With the frame’s parts generally in place, you’ll next need to carefully line up the components. Proper assembly of T-slot framing is a must, as this will keep connections in alignment longer.
Use a good reference square, level, and height gauge to check the T-slots for precision.
(Tip: You can also use a ruler to space out T-nuts evenly for more consistent rigidity.)
Step 5: Tighten the Connections
T-slot assemblies aren’t known for their stiffness. It’s on you to connect the assembly as tightly and accurately as possible to delay the inevitable maintenance it’ll require.
(Tip: Consider grabbing another 1-2 workers to help from this point on – the tightening-aligning cycle gets time-consuming and there’s nothing like having an extra set(s) of hands.)
Use your hex key or socket wrench to turn each fastener by hand until it’s secure. As the distance between cross-sections gets smaller, you’ll have to get creative configuring yourself or your assembly for access.
Step 6: Measure, Loosen, Retighten, … Repeat (a Lot)
With the assembly “complete,” you’ll check each section for squareness. Look for crooked joints that result in clearance and uneven distribution of loads.
From there? You guessed it – more of the same until your assembly reaches precise alignment:
- Re-measuring
- Re-loosening
- Re-tightening
T-slot assembly requires an extra 1-2 minutes per connection because adjusting one component often forces another part out of place. Unfortunately, these framing systems typically lack an alignment feature.
(Tip: Consider building a jig or using a drill bit to keep pieces in alignment while you tighten them.)
Step 7: Verify
Aluminum frame assemblies come with many, many parts, and a lot of them are tiny and hard to discern. Look over the structure to ensure that:
- All components are installed in the proper place
- All fasteners are fully tightened
- All other details (i.e. end caps, handles) made it onto the assembly
(Tip: Match the contents to your bill of materials for quicker verification.)
Self-Aligning Framing Assembly Steps
Don’t be intimidated – if you know how to use 80/20 T-slot aluminum, you’re capable of assembling self-aligning frames.
Other than being 50% faster to build, advanced framing comes together similarly to T-slot assembly, so we’ll mostly focus on the differences.
Step 1: Unbox
Because components come pre-fitted and fastened, there’s no need to sort, measure, or compare 100s of part types after unboxing. There’s also less to manage in general since the mechanical connections are stronger and you’ll need fewer of them.
Step 1.5(?): Tap Holes
A standard assembly will take up to 2 minutes to tap holes for leveling feet. With this style of aluminum framing, there’s no value in replacing corner brackets with tapped holes – it’d negate the self-aligning features.
Step 2: Assemble Framing & Connections
With brackets already taken care of, you can move straight to connecting the profiles. You’ll only need one person and one hex key.
(Tip: Unlike with T-slots, there are many elements (think: doors) you can easily assemble separately from the frame. Identify as many of these elements as possible. This saves time and irritation.)
Loosen each screw by a few threads and slide the component into the slot of the appropriate profile.
Orient the brackets so they’re easy to access afterward. Maintenance is minimal with frames that self-align, but you may want to repurpose the assembly later. You’ll also want a clear path for any operator who needs to access an attached machine.
Once the component is in the correct location, torque the screw to spec.
That’s it – you’ve now formed a mechanically locked connection, with no further tightening necessary. If the ends of the profiles are blocked, make sure not to forget any angle nuts you’ll need for connecting brackets later in the assembly process.
Example: 3-Way Corner
This video demonstrates connecting a 40mm three-way corner bracket to inset panel and three-way corner, standard-duty profiles. The steps are:
- Unfasten screws to allow inset panel to slide on
- Lift angle nut and slide profile onto corner bracket
- Tighten screws
- Repeat for other side of bracket and corner profile
Example: Threaded Insert
This video demos the assembly of a 40mm self-tap threaded insert.
- Unscrew bolt from nut
- Slide in threaded insert, starting with narrow end
- Screw in insert with Allen key, stopping before last thread
- Turn nut a few times, leaving room for it to slide onto profile
- Screw in bolt
Step 3: Verify
No level or square is necessary, as the uniquely engineered connections automatically stay in alignment, even in times of vibration.
All you need to do is double-check that the correct profile type and size are in each spot. Ensure you’ve mounted the assembly plates correctly and that no fasteners are MIA.
Finally, get a torque wrench and check the bolts. Put pressure on each bolt until it clicks, and verify that the measurement is in the 160-180 inch-pound range. This guarantees the assembly will meet your torque specs and all pieces will stay in place.
Short-Term vs. Long-Term Assembly
Due to their lightweight and modular nature, aluminum structural framing systems take less muscle and skill to assemble than welded steel frames. We wholeheartedly recommend learning how extrusion building systems work and tackling the job in-house vs. hiring someone else. (Admittedly, this will be easier if you invest in a long-term, industrial-grade system that maintains precision without constant manual retightening and realignment.)
You may be able to get by with T-slots if you:
- Need a cheap, widely available commodity
- Have someone on-staff with free time to dedicate to assembly
- Are using it for a low-intensity (static) application
You’re better off using self-aligning aluminum assemblies if you:
- Need a more sophisticated engineering solution that adds long-term value
- Want assembly done in ½ the time by one person
- Are using it for a dynamic, vibration-heavy application
To learn more about structural framing system best practices, check out our main site:

Leave a Comment