
Modular Aluminum Profile Assembly – Building With AngleLock Systems
Weldments have no room for error. T-slot assembly can take hours. For your next structural frame, consider the simple genius of AngleLock aluminum profile assemblies. AngleLock’s patented system is more mistake-friendly than building with common T-slots or welded steel frames, allowing for endless modifying and repurposing. All components are packaged as preassembled kits, including all hardware needed for use. This page will teach you: how AngleLock empowers easy DIY assembly, what to expect when your AngleLock order arrives, tips for assembly, AngleLock’s contract assembly services
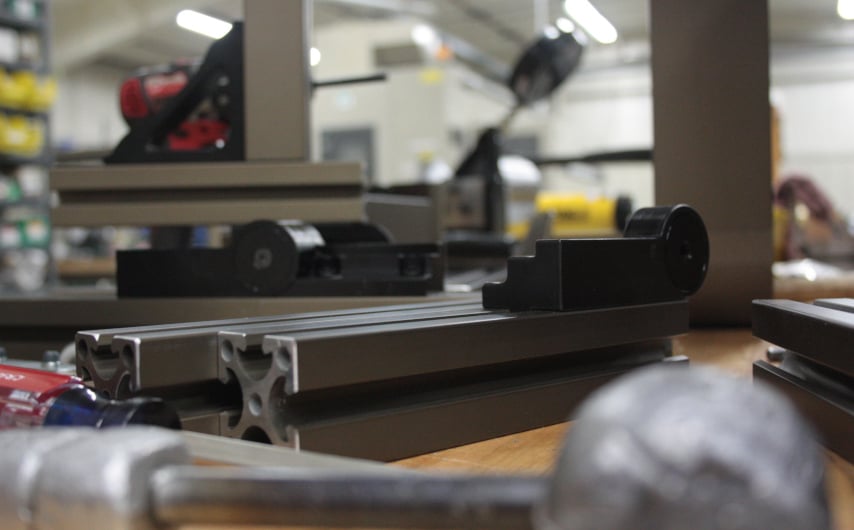
AngleLock: The Easiest Aluminum Profile Assembly You’ll Ever Handle
If you know how to connect T-slot aluminum, you’re capable of assembling AngleLock parts – at a much faster rate. Beyond the numerous cost implications, the benefits of DIY’ing with AngleLock include:
Faster
Quicker than assembling a T-slot structural frame, and no waiting for an expensive welder each time you need modifications.
Easier
Assembling the lightweight parts with instant precision usually only takes one person and one hex key.
More convenient
We’ve simplified the ordering and unboxing process so you’re not stuck with hundreds of parts to sort.
Industrial quality
AngleLock’s connection system turns T-slots’ weakness into a literal strength while avoiding the distortion caused by weld joints.
Streamlined
Stronger connections means fewer components are necessary, improving cost, aesthetic appeal, and operator access.
What to Expect: Ordering Preassembled Framing Components
When you open the box, you’ll notice the product comes prefitted and fastened. This simplifies not only ordering the components, but using them too. There’s no sorting through bag after bag of parts to categorize and correctly match them.
No level or square is necessary, because the connections automatically align and do not loosen due to jostling or vibration over time.
To get started, simply loosen the screw by a few threads and slip the components into the slot of the appropriate profile. When the component is in the correct location, torque the screw per your specs. You’ve now formed a fixed connection!
(Pro tip: Most AngleLock connections use an M6 bolt with a torque recommendation of 180 in-lb. This roughly equates to getting the bolt hand snug with your allen wrench if you don't have a way to measure the torque.)
From there you can continue building your structural aluminum frame until your project vision is complete. We include drawings and a 3D model with all project kits, and offer aluminum extrusion design assistance. Consult our engineering team if you have any performance concerns:
Tips for Aluminum Frame Assembly – Profiles & Brackets
There are general rules of thumb that apply to every project:
1
Check that the correct profile type and size are used in each spot.
AngleLock offers highly engineered systems that add strength only where it’s needed – don’t waste a high-strength component on a low-stress area.
2
Ensure assembly plates are correctly mounted, and no fasteners are missing.
The unique connections allows for the full capabilities of the profile to be utilized and help AngleLock stand above T-slot frames. Don’t forget any of the angle nuts needed to connect brackets later during assembly!
3
Orient the brackets so they’re easy to access afterward.
Maintenance is virtually nonexistent with AngleLock, but you may want to modify the assembly for another purpose later. You’ll also want a clear path for any operator who needs to access an attached machine or control.
How to Use a 3-Way Corner
The process takes just one worker, a hex key, and a few minutes’ time. This video takes you through connecting a 40mm three-way corner bracket to inset panel and three-way corner standard-duty profiles.
- Unfasten each screw to allow inset panel to slide on
- Lift angle nut and slide profile onto the corner bracket/li>
- Tighten screws to lock in profile
- Repeat for other side of corner bracket and for corner profile
How to Use a Threaded Insert
This video shows the assembly of a 40mm self-tap threaded insert. The supporting actors are a four-slot, standard-duty profile and a simple 6mm Allen key.
- Unscrew bolt from the angle nut
- Slide threaded insert narrow end in first
- Screw in insert with Allen key (drill or wrench) – stop when you get to the last thread
- Grab angle nut & turn a few times on the thread – leave room to slide nut into profile
- Screw in bolt until tight
Contract Assembly Services for Metal Framing
Still don’t feel comfortable handling the assembly on your own? We offer full industrial module assembly services.
Or we can put together only the first 1-2 products so you can see how it looks – and how simple it is to assemble yourself!
Note that requesting full preassembly affects the delivery time of your order. For most projects, preassembly adds 2 weeks to lead time. These numbers are subject to change based on capacity.
There will also be added assembly and crating costs.